I made the nice list. The DEWALT drill came from Santa, along with a driver tool set and a case of bits I didn’t yet know how to use. Generous. Optimistic. Possibly a challenge.
If you are hanging your first shelf, using a drill for the first time, or standing in front of a wall wondering whether you are about to make a very expensive mistake, this one is for you.

I learned all of this one confused question at a time, so feel free to skip ahead to the part of the journey you’re currently stuck on.
(DEWALT Style)
Consider this the “How to Use the Drill Without Panic-Googling Every Step” section. We’ll cover the parts of the drill, how to swap bits, what the buttons do, & the simple technique that makes driving screws dramatically easier.
Choosing the Right Bit
Just when I thought I understood the drill, I learned that screws have personalities too (INTP). This section covers the different driver bits, how to identify the one you need, and how to avoid turning a perfectly good screw into a tiny metal circle of regret.
Actually Hanging the Shelf
Walls are surprisingly complicated once you start putting holes in them. We will cover the difference between drywall and studs, when you need anchors, and how to keep your shelf from becoming an unexpected floor decoration.
1
How to Use Your Drill
The DEWALT came in a case. Inside the case was the drill, a charger, a battery. Then, I had a plastic container full of little metal pieces in different shapes and sizes. I stared at them for longer than I would like to admit.
Those little metal pieces are called bits, and this is the first thing I wish someone had explained to me out loud: they are not interchangeable. There are drill bits, which make holes, and driver bits, which drive screws. Drill bits are pointed and twisted. Driver bits are flat-ended with a shaped tip. They go in the same drill, but they do completely different things.

Drill Bit (LEFT): The metal attachment that fits into the front of a drill and creates holes in the material you’re working with. The drill bit is absolutely rotini shaped.
Driver Bit (RIGHT): The metal piece that matches the shape of a screw head and allows your drill to tighten or remove the screw.

The front of the drill is that cylinder-shaped piece that opens and closes, is called the chuck. You twist it counterclockwise to open it, drop your bit in, and twist it clockwise to tighten it. No tools needed. Just your hands. Once I figured this out, I spent a solid few minutes just opening and closing the chuck because it was satisfying. No regrets.
Once your bit is in, the trigger controls how fast the drill spins. Gentle squeeze for slow, full squeeze for fast. Start slow. I cannot stress this enough. Starting slow gives you control and keeps the bit from skipping across the surface before it actually catches.
The small button near the trigger is the direction switch. It is forward to drive things in, reverse to back them out. I discovered this one the embarrassing way when I was driving a screw in reverse for a full ten seconds before realizing nothing was happening. [The screw was judging me. I could feel it.]
2
How to Choose Your Bit
This was the part that tripped me up the most, and honestly it makes total sense that it would. Nobody tells you this stuff. Driver bits have different tip shapes to match the different shapes cut into screw heads. The most common ones you will encounter are:

Phillips
A cross-shaped driver bit used to tighten and remove Phillips-head screws. It is one of the most common types.

Flathead
The one that’s exactly what it sounds like—a straight line. It doesn’t make as many appearances as Phillips, but every DIY project eventually seems to summon one.

Torx
The star-shaped one. It tends to show up just often enough to earn a permanent spot in your toolbox.
Before you start driving anything, test-fit the bit into the screw head. It should sit snugly without wobbling. If it feels loose, you have the wrong size and you will strip the screw head — meaning you round out the shape and the bit can no longer grip it. A stripped screw is a bad time. Test first.
When I got the right bit in and it clicked into that screw head perfectly, something about it just felt right. Like a key in a lock. That’s when I knew I was finally set up correctly.
3
Actually Hanging the Shelf
Standing in my kitchen with a drill in my hand, all I could think about was what might be hiding behind that wall. Pipes. Wires. Mice. A portal to a dimension where all my home improvement projects don’t hit a snafu.
Nevertheless, the first thing to figure out is what’s behind your wall. A stud finder, a small tool you run across the wall that beeps when it detects the wooden beams (studs) behind the drywall, is worth having. Studs run vertically every 16 inches or so, and a screw driven into one is anchored in solid wood. My shelf brackets didn’t line up with a stud, which is very common, so I needed another plan.

That plan is wall anchors [ fanfare ]. Drywall by itself is not solid. It is compressed gypsum sandwiched between paper, and a screw driven straight into it will pull out the moment any weight is applied. An anchor is a plastic sleeve that you push into a pre-drilled hole; when the screw goes through it, the sleeve expands and grips the wall from inside.
The IKEA KLAVRESTRÖM did not include screws or anchors. It notes that wall materials vary. This is accurate and also slightly unhelpful when you are standing in the hardware aisle. If you get plastic expansion anchors and the matching screws, the packaging tells you which drill bit size to pair with them.
Hi hi! 😊 The fear of hitting a pipe or electric wire is normal. Many stud finders include AC wire detection. Use it. 🧰 And know that pipes in a kitchen typically run near the sink and along exterior walls. 👀 Drill slowly, check what comes out on the bit, and trust that you will notice before anything goes wrong!
Now, to make the holes: swap in your drill bit, hold the drill straight (not angled), squeeze the trigger slowly, and let it do the work. You will feel when it is through the drywall (trust me!). Pull the bit out, tap the anchor in with your finger or a gentle hammer tap until it sits flush against the wall, and then swap back to your driver bit to drive the screw into the plastic anchor.
SHELF CONFIDENCE
The Fine Print Santa Left Out 🎅
A few lessons learned after discovering that owning a drill and knowing how to use a drill are two very different things.
Practice on scrap first. If you have a piece of spare wood lying around, drive a few screws into it before you touch the wall. You will learn how the drill feels and sounds when everything is working correctly, which makes it much easier to notice when something is off.
Do not over-tighten. The clutch (the numbered ring around the base of the chuck) controls how much force the drill applies before it stops. A lower number stops earlier, which protects your screws. For driving into drywall anchors, somewhere around 8 to 10 is a safe starting point. Over-tightened screws strip the anchor and you have to start the hole over. Ask me how I know.
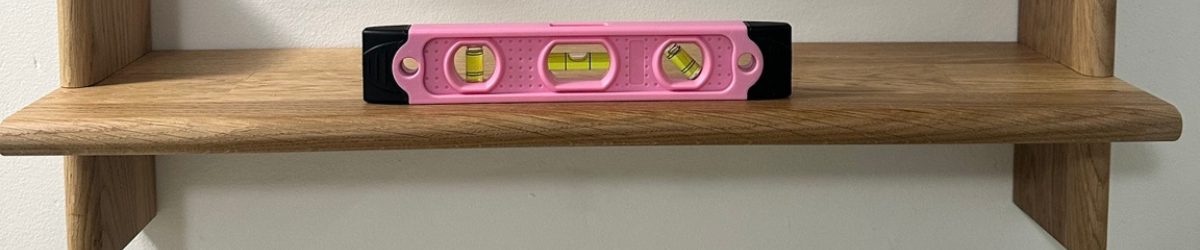
Measure before you drill. The holes only take a few seconds to make, but deciding where they belong takes much longer. Use a level, a ruler, a yardstick, and don’t be afraid to cover the wall in pencil marks while you figure out the placement. Pencil wipes off. Frog Tape is peely. Extra holes do not. Ask me which one I’d rather have.
About esseio.
Providing clear-cut instructions for your home renovation project because transforming your living space should be simple, pleasing, and worry-free.
Leave a Reply