We have all been knee-deep in a home improvement project only to encounter an unexpected cascade of cigarette butts, drywall dust, and well-worn and stain-soiled shop towels plopping down onto you. Oh, just me? Well, that was my shocking baseboard removal experience.
Removing baseboards is easily accomplished with the right tools, some craftsmanship, and patience—perfect for those of us with minimal home improvement experience. This guide will walk you through each step, inviting you to learn and enjoy the calming, sensory-rich process. So, grab your tools, and let’s get started.
gET CRAFTY
Baseboard Bon Voyage!
Before we dive into the nitty-gritty, picture this: you have already bid farewell to your carpet, and the cleaning is done—we prefer to start with a clean canvas for our masterpiece. The baseboards in my place were not painted or caulked, so I did not score a line along the baseboard; however, this is an essential step if the baseboard does have paint or caulking.
Tools needed to remove the baseboards: a utility knife, pry bar, joint knife, end-cutting pliers (the preferred tool to dislodge nails from the baseboard), or needle-nose pliers, and protective gear (heavy gloves, a mask, eye protection, and knee pads).
Not required but can be used: a Sharpie marker to number the corresponding walls and baseboards, so there is no guesswork when you install them after painting or staining. Frog Tape (any “less sticky” tape will suffice) keeps the boards together. And, of course, the gardening chair to roll around the room.
Create shallow cuts along the painted or caulked edges of the baseboard for easier removal and to prevent splintering or damage to the wall. After scoring, test the baseboard’s resistance by following the next step—the baseboard should move with minimal resistance.
Begin at the end of the board. If you start in the middle, you risk snapping it. Then, shimmy the tool carefully between the wall and the baseboard as long as you feel no resistance.
Again, stop and reassess if there is resistance to positioning the tools. Start over at a different spot along the baseboard.
Think “slow and steady” as you move the pry bar toward the wall. The baseboard might not initially pop away from the wall just yet.
Experiencing Trouble? Peek behind the baseboard to locate the nails that hold it in place. Then, align the pry bar in front of a nail, apply outward pressure, and slowly dislodge the board from the wall.
Think “slow and steady” as you move the pry bar toward the wall. The baseboard might not initially pop away from the wall just yet.
There are many ways of completing this task, depending on the tools you have on hand and whether or not you want to spend money on a new tool—a hammer, needle-nose pliers, Vise Grips, or end-cutting pliers.
Finally, clean and inspect the area.
⚠ Important Note
Be mindful of any hidden elements behind the baseboard, such as electrical wiring, plumbing, or a mouse skeleton (true story, but not mine), which are essential to your safety and avoiding unexpected challenges during the removal. So, approach baseboard removal methodically.
1
Score the Baseboard
Scoring is a simple yet crucial step when you are removing baseboards. It involves minor cuts along the top edge where the baseboard meets the wall, preventing them from getting damaged during removal—think splintering or pulling chunks of the paint or drywall.
To score, use a utility knife and apply light pressure, then slice along the top edge where the baseboard meets the wall (steady hand required!). Think of it as making a teeny groove deep enough to break the paint or caulk seal. You are creating a stress-free exit strategy for your baseboard without causing damage.
2
Wedge the Joint Knife Behind the Board
The next stage is creating a space between the wall and the baseboard. Starting the separation of the baseboard from the wall without a fight: no drama, broken baseboard, or wall casualties.
You ensure the baseboard comes off cleanly by carefully inserting and maneuvering a wide, flexible joint knife (a 5-inch or 6-inch knife usually works well). The flexibility of the knife is crucial, as it must bend slightly to conform to the space between the wall and the baseboard.
Starting at an edge or corner, insert the blade of the joint knife into the gap created by scoring the caulk/paint. If the opening is too tight, some say you can lightly tap the knife handle with a hammer to wedge it, but I moved to another spot along the baseboard. Now, gently insert the taping knife, wiggle, and slide it to widen the gap. Space these points evenly along the length of the baseboard for balanced leverage.
Be aware of nails holding the baseboard to the wall. You may feel these as you slide the joint knife up and down the board. You will use these nails as a guide in the next step.
3
Gently Slide the Pry Bar Behind the Joint Knife
Alright, your great pry bar adventure awaits. You have got your joint knife wedged in there like a champ, and now it is time for the pry bar to make its grand entrance.
First things first, grab your pry bar. You want the tool to be just right, neither too big nor too small. The goal is to fit all snugly behind the knife. A small to medium-sized pry is best. Now, introduce the pry bar. The joint knife acts as a shield, protecting your precious walls from scratches, dents, and the outward pressure you will apply soon. Although you can position the pry bar behind the knife, use caution when exerting pressure.
Apply gentle pressure and slide the pry bar along the length of the baseboard. Imagine you are spreading butter on toast—but please don’t actually use butter. (A bizarre yet oddly humorous twist to moving into my home was discovering a lone stick of real butter left on the kitchen floor by the previous owners.) As you move along the length of the baseboard, reposition the joint knife to new spots.
🚨 Unintentional ASMR
As the metal edge distinctly, albeit gently, contacts the wood, there is a soft, muted clunk—a solid yet subdued sound reassuring in its firmness. The contact between metal and wood materials produces a tactile and auditory experience.
4
Apply Outward Pressure
The key here is to increase the force gradually. Sudden or excessive force can damage the wall or cause the baseboard to snap. Imagine you are trying to open a stuck window; you apply enough pressure to move it without shattering the glass.
Watch the gap between the baseboard and the wall as you apply pressure. You should see it widening slowly. If you notice any resistance or hear cracking sounds, pause and reassess your approach. It might be necessary to reposition the pry bar or apply pressure at a different angle.
You can peek behind the board to locate nails because they are exactly where the points of resistance are. Once you have identified the nails, the next step is to strategically align the pry bar. Position the pry bar directly in front of a nail, ensuring it is close enough to leverage against the nail but not so close that it damages the baseboard or the wall.
Now, apply outward pressure with the pry bar. The goal is to use the nail as a pivot point, leveraging it to gently coax the baseboard away from the wall. Use steady, controlled pressure, focusing on each nail in turn. As you work the pry bar against each nail, you should feel the baseboard gradually coming loose. Work in sections, applying pressure evenly across different points. Remember, patience and precision are essential to ensuring a clean removal without causing unnecessary damage.
🚨 ASMR Sounds
Oh, the delicious sounds. As the baseboard begins to separate from the wall, a series of soft pops and cracks occurs—a release of tension in the materials. This creaky groan sound marks the success of your careful work, a small victory in the overall task.
5
Repeat Steps 1-4
Continue the baseboard removal process along the entire length of the board. Methodically move along, repeating the initial steps:
- Wedge the joint knife behind the baseboard.
- Gently position the pry bar.
- Applying steady outward pressure.
- Address any nails you encounter.
Once you have loosened the entire length of the baseboard, you can gently pull it away from the wall. If the baseboard is long, it is advisable to have someone help you support its weight as you detach it to prevent it from snapping or causing injury.
As you progress, you may find sections that come away more quickly. In these areas, gently pulling the baseboard free with your hands might be possible. Using your hands works exceptionally well in places where the nails have previously come away; however, be cautious and ensure you are not using excessive force, which could break the baseboard. You can efficiently detach the entire baseboard by alternating between the pry bar and careful hand pulling, ensuring a clean and complete removal.
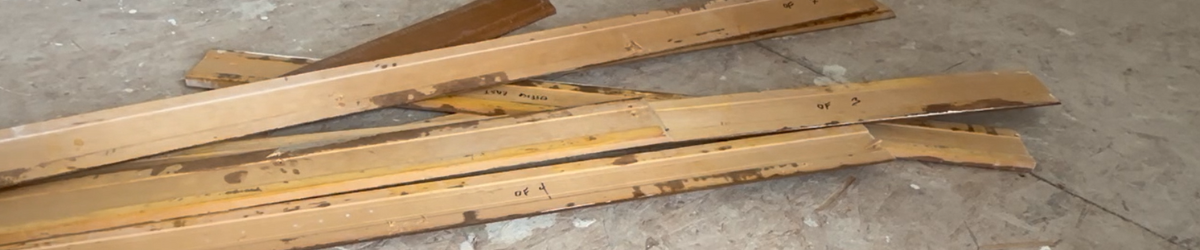
Let’s talk about keeping things in order–literally. Keep a Sharpie or pencil nearby if you are prone to mistakes, and put a corresponding number on the wall where each baseboard was removed. When it is time to reinstall, you will know exactly where each piece goes; no head-scratching is required. I affectionately dubbed it the “Frog Tape Tower”—a makeshift yet ingenious structure using Frog Tape to keep the baseboards secure and organized during the stripping and staining phase of the baseboard removal project—a simple yet effective way to manage your baseboards for hassle-free reinstallation.
6
Remove the Nails
You can use a hammer, needle-nose pliers, Vise Grips, or end-cutting pliers to remove the nails. Each tool has its pros and cons. Read how to remove nails from the baseboard and the wall after detachment to prepare for reinstallation or replacement.
And there you have it!
You are now ready to tackle those baseboards like a pro. Take a moment to clean and inspect the baseboards after removing them. Sweep up any debris and dust to ensure the room is tidy and safe. Then, give the walls a thorough once-over, checking for any damage or irregularities that need attention before moving on to your next project step. Remember, this is not a race. Take your time, and enjoy the process.

Are you curious about ASMR home improvement videos?
Explore oddly satisfying + mostly unintentional videos on my YouTube Channel.
-

How to Clean a Clothes Dryer
NEVER once thought of cleaning the inside of my clothes dryer. Removing lint from the lint trap was enough. Wrong. I was standing in the primary bedroom when…
-

What’s the Difference Between White and Black Mallets?
Oh, I learned the hard way about the differences between white and black rubber mallets. No sound is more jarring than slamming a white rubber mallet against a…
-

How to Remove a Toilet Tank
Whether your current tank is acting up, is cracked, or you need to remove floral wallpaper behind the egregious, water-wasteful 1990s tank [ deep sigh ], knowing how…
-

Remove Nails from Wood + Baseboards
Removing nails requires a bit of finesse, and each nail puller tool has its qualities. The hammer is old and reliable, the pliers are the precise ones, Vise-Grips…
-

How to Remove Baseboards
We have all been knee-deep in a home improvement project only to encounter an unexpected cascade of cigarette butts, drywall dust, and well-worn and stain-soiled shop towels plopping…
-

Carpet Tack Strip Removal
Embarking on a home improvement project is akin to peeling back the layers of time, revealing decades of wear and tear. One such formidable task is the removal…
Leave a Reply